# 安装
yarn add react-native-config
- 添加原生链接
cd ios && pod install && cd ..
# 使用 .env 中的配置
安装完成后,我们就可以在 Obj-C 类中使用 .env 中声明的变量了:
// import header
#import "ReactNativeConfig.h"

// then read individual keys like:
NSString *apiUrl = [ReactNativeConfig envFor:@"API_URL"];

// or just fetch the whole config
NSDictionary *config = [ReactNativeConfig env];
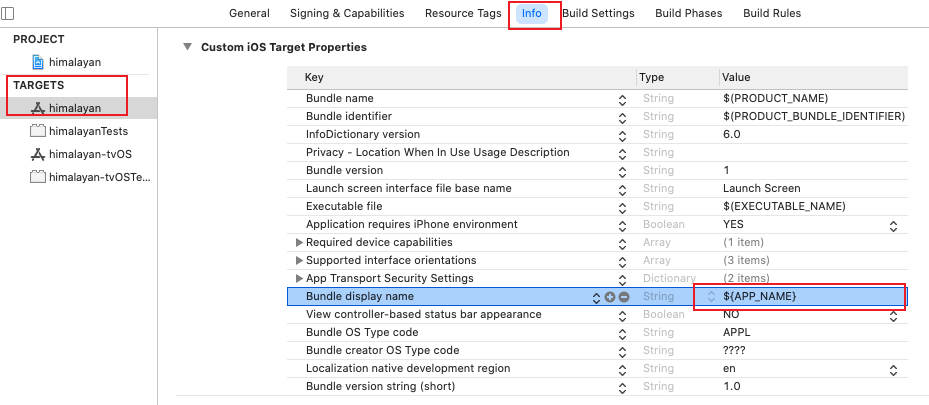
但是如果想要在 Build settings 和 Info.plist 中使用的话,还需要额外的配置。比如 ios 的项目名称就是在info.plist配置的。
下面就来配置一下,让 info.plist使用 .env 里面的值。
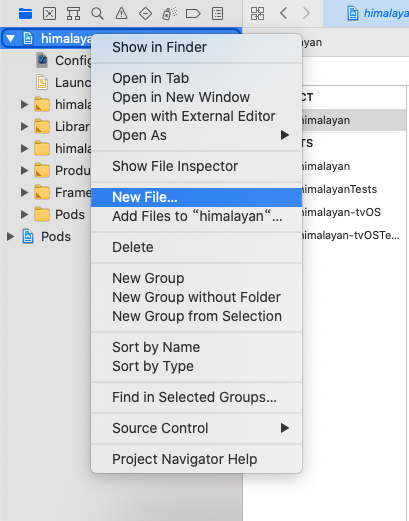
进入 项目的 ios 目录,双击 himalayan.xcworkspace,xcode就会打开项目。
右键项目名称,点击 New File... 菜单:
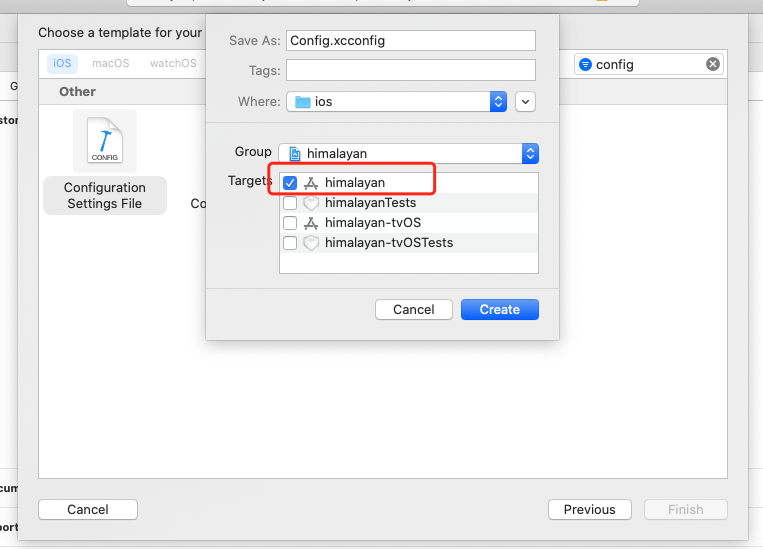
- 创建一个配置文件:

名称使用默认的就可以了,在target 里面选择 himalayan:
- 编辑Config.xcconfig:
#include? "tmp.xcconfig"
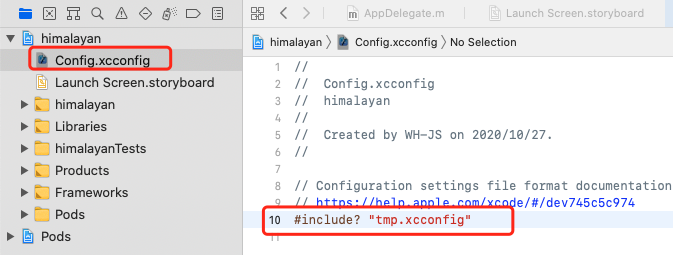
因为 tmp.xcconfig 是动态生成的,所以不用提交到 git
# react-native-config codegen
ios/tmp.xcconfig
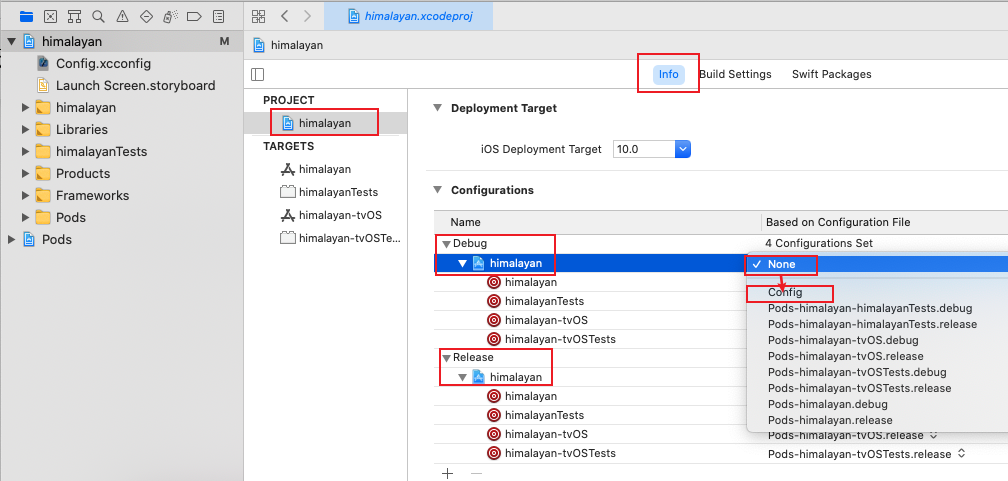
- 应用配置文件
想要使用配置文件,我们还需要在 Debug 和 Release 中做配置:
点击targets的 himalayan,打开 build phase
点击加号,创建一个脚本:
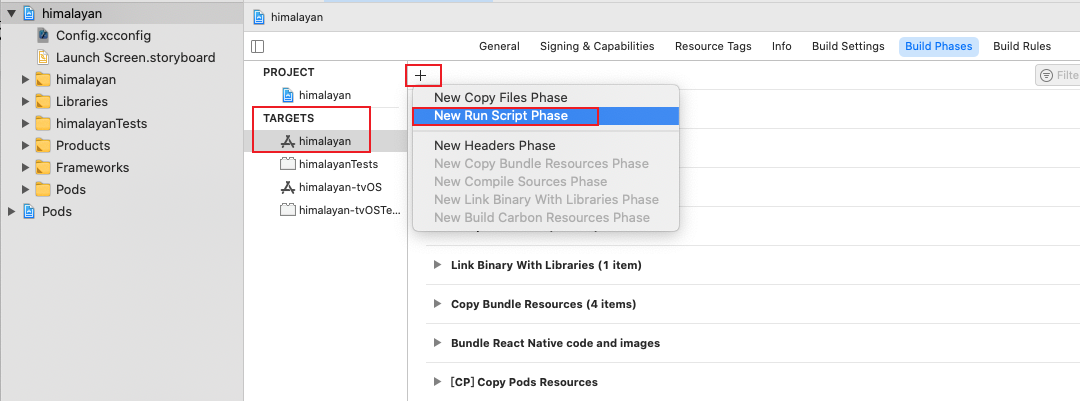
在脚本里面添加代码:
"${SRCROOT}/../node_modules/react-native-config/ios/ReactNativeConfig/BuildXCConfig.rb" "${SRCROOT}/.." "${SRCROOT}/tmp.xcconfig"

- 最后,我们就可以在 info.plist 使用 .env 中的配置了